How do you install a single handle shower faucet?
How do you install a single handle shower faucet?
To install a single-handle faucet, you’ll have to cut a hole into your shower surround. If your surround is fiberglass or acrylic, cut the hole using a jigsaw and a fine-tooth blade (a coarse blade causes more vibration, which can crack the surround). Apply strips of masking tape to the surround to avoid scratching or chipping the surface.
What’s the difference between single handled and double handled shower faucets?
Single-handled shower faucets have a tee connection to both hot and cold water supplies and control water temperature and water flow with just 1 handle. Double-handled shower faucets have 1 control for hot water and 1 control for cold water.
What should I do if my shower faucet is not working?
In the event that you cannot find any stop valves, then you will need to shut off the water to the house via the water main. Drain the pipes in the shower after it is shut off until no water remains. With the same screwdriver, pop off the plastic cap located at the end of the faucet handle. Inside the hole, locate the screw.
How do you remove a single hand shower handle?
If you have a lever type handle, you may need an Allen wrench to remove it. Simple loosen the nut with the wrench and slide the handle off in a similar fashion. Many single-handle fixtures have a temperature limiter (also sometimes called a rotation limit stop), which is a device that stops your handle’s rotation to a “maximum” heat setting.
How do you install a one handle shower faucet?
Start with installing the seats and springs FIRST. Insert the spring wide-end first then place the rubber seat over the narrow end of the spring. TIP: You may find it easier to assemble the seat and spring outside of the faucet and then place onto the tip of a screwdriver and insert them into the faucet body.
What to do if one handle shower faucet leaks?
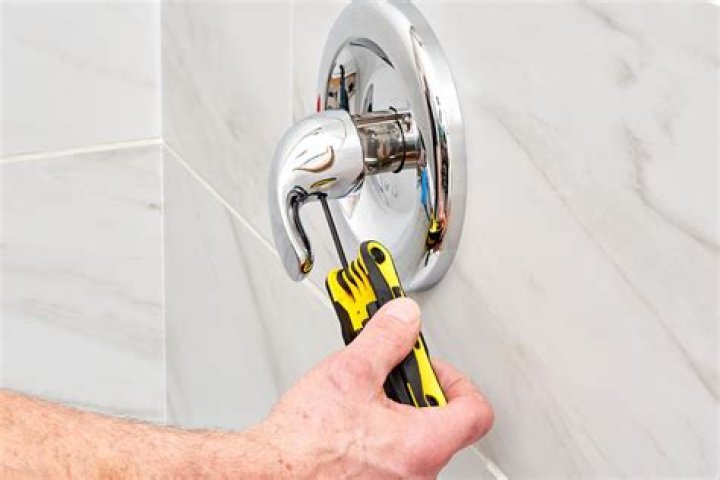
Turn off the Main water-supply to your home (usually found outside near the street). For Knob Style Handles, remove the index Button by prying off with a Screwdriver. For Lever Handles, remove the Set Screw with a Screwdriver or Allen Wrench and then remove the Handle.
How do you remove a one handle shower handle?
For Lever Handles, remove the Set Screw with a Screwdriver or Allen Wrench and then remove the Handle. Unscrew the Handle Screw and remove the Handle. Loosen the cam nut to reveal the plastic cam and ball assembly. The cam nut is a dome-shaped piece below the handle. Turn the cam nut counter clockwise to remove.
What’s the best way to install a shower surround?
Set the cutting depth of the bit at 1/4 in. and make the first pass. Make more passes, setting the bit 1/4 in. deeper each time until you’ve cut completely through the surround. If you don’t own a rotary tool, you have a few other options: You can try a jigsaw and ceramic tile blade (about $5).
Where is the best place to mount a shower spout?
This video has some good insight into mounting your shower valve to the wall studs and positioning the shower valve on the center of your tub drain location. We also discuss plumbing protector plates and why and how we must use them in our project. This video will help you with your bathroom remodel project rough-in plumbing tasks. Loading…
What do you need to change a shower valve?
Required Materials for this how to change shower fixtures project 1 Copper fittings 2 New valve 3 Pipe joint tape 4 Plastic access panel 5 Renovation cover plate 6 Shutoff valves